Setting up Bluehost is simple and fast. You can get your website online in no time.
Bluehost is a reliable web hosting service that caters to a variety of website needs. Whether you run a small blog or a large e-commerce site, Bluehost has you covered with its range of hosting solutions. From shared hosting to dedicated hosting, there is a plan for everyone. Plus, it is optimized for WordPress, making it a great choice for bloggers and businesses. With free domain registration for the first year, a free SSL certificate, and 24/7 customer support, Bluehost ensures your site runs smoothly and securely. Ready to get started? Click here to set up your Bluehost account today!
Introduction To Bluehost
Bluehost is a leading web hosting service known for its reliability and user-friendly features. It caters to various website needs, making it a popular choice for businesses and individuals alike.
What Is Bluehost?
Bluehost provides web hosting services that range from affordable shared hosting to robust dedicated hosting. It supports small blogs, large e-commerce sites, and everything in between.
| Hosting Type | Description |
|---|---|
| Shared Hosting | Suitable for small to medium-sized websites. |
| VPS Hosting | More power and flexibility for growing websites. |
| Dedicated Hosting | Maximum control and performance for high-traffic sites. |
| WordPress Hosting | Optimized for WordPress with enhanced security and performance. |
Why Choose Bluehost For Your Website?
Choosing Bluehost offers several benefits:
- Reliable Performance: High uptime rates and fast loading speeds.
- User-Friendly Interface: Easy-to-use control panel and website builder.
- Scalability: Options to upgrade hosting plans as your website grows.
- Security: Enhanced security features including free SSL and daily backups.
- Affordability: Competitive pricing with various plans to suit different budgets.
Bluehost also offers a 30-Day Money-Back Guarantee, allowing you to try their services risk-free. Their 24/7 customer support ensures you always have help when you need it. With these features, Bluehost is a solid choice for hosting your website.
Getting Started With Bluehost
Are you ready to launch your website with Bluehost? This guide will help you get started in no time. From creating an account to selecting the best hosting plan, we have you covered. Follow these simple steps to set up your Bluehost account.
Creating A Bluehost Account
First, visit the Bluehost website. Click on the “Get Started Now” button. You will be redirected to the signup page.
Fill in your details to create an account. You’ll need to provide your name, email address, and a strong password. Make sure to use a valid email address as you’ll receive important information there.
After completing the form, click on the “Create Account” button. You will then be asked to verify your account through a captcha. This step ensures security and confirms you’re human.
Choosing The Right Hosting Plan
Bluehost offers several hosting plans to fit different needs and budgets. Here’s a quick overview to help you choose the right one:
| Hosting Type | Description | Starting Price |
|---|---|---|
| Shared Hosting | Affordable, suitable for small to medium-sized websites. | $2.95/month |
| VPS Hosting | More power and flexibility for growing websites. | $18.99/month |
| Dedicated Hosting | Maximum control and performance for high-traffic sites. | $79.99/month |
| WordPress Hosting | Optimized for WordPress with enhanced security and performance. | $2.95/month |
Consider your website’s needs and future growth when selecting a plan. For beginners, shared hosting or WordPress hosting is a great start. As your website grows, you can upgrade to VPS or dedicated hosting.
Bluehost also offers a free domain name for the first year, making it easier to get started. Additionally, all plans include a free SSL certificate, enhancing your site’s security and SEO.
Final Steps
After selecting your hosting plan, complete the payment process. Bluehost offers a 30-day money-back guarantee, so you can try their services risk-free.
Once your payment is confirmed, you’ll receive a welcome email with details on how to log in to your control panel. From there, you can start building your website and exploring Bluehost’s features.
With reliable performance, user-friendly interface, and excellent customer support, Bluehost is a great choice for your web hosting needs.
Setting Up Your Domain
Setting up your domain is an essential step in creating your online presence. With Bluehost, you can either register a new domain or link an existing one. Here’s how to get started:
Registering A New Domain
Bluehost makes it easy to register a new domain. Follow these steps:
- Log in to your Bluehost account.
- Navigate to the Domains section in the control panel.
- Click on Register a New Domain.
- Enter the domain name you want to register. Ensure it’s unique and relevant to your business.
- Check the availability of the domain. If it’s available, proceed to the next step.
- Add the domain to your cart and complete the purchase process.
Upon successful registration, your new domain will be automatically added to your Bluehost account. You will also receive a free domain name for the first year with your hosting plan.
Linking An Existing Domain
If you already own a domain, you can easily link it to your Bluehost hosting account. Here’s how:
- Log in to your Bluehost account.
- Navigate to the Domains section in the control panel.
- Click on Assign a Domain to Your cPanel Account.
- Enter the domain name you want to link.
- Verify ownership of the domain. You can do this via EPP code or by changing the name servers.
- Once verified, complete the setup process by following the on-screen instructions.
Your existing domain will now be linked to your Bluehost hosting account. This allows you to manage all your domains and hosting services in one place.
Bluehost provides a user-friendly interface and 24/7 customer support to assist you throughout the process. Whether you’re registering a new domain or linking an existing one, Bluehost ensures a smooth and hassle-free experience.
For more details, visit Bluehost.
Installing WordPress On Bluehost
Setting up a website is easy with Bluehost. This guide explains how to install WordPress on Bluehost. Follow these steps to have your site up and running quickly.
Using The One-click Install Feature
Bluehost offers a simple one-click install feature for WordPress. This is the easiest method, especially for beginners.
- Log in to your Bluehost account.
- Navigate to the My Sites section.
- Click on the Create Site button.
- Enter your site name and tagline.
- Choose your domain from the drop-down menu.
- Click Next to install WordPress automatically.
The installation process usually takes a few minutes. You will then receive a confirmation message.
Manual Installation Of WordPress
For those who prefer more control, manual installation is an option. This method involves downloading WordPress and uploading it to your Bluehost account.
- Download the latest version of WordPress from the official WordPress website.
- Log in to your Bluehost account and go to the cPanel.
- Navigate to the File Manager and open the directory where you want to install WordPress.
- Upload the downloaded WordPress file and extract it.
- Create a MySQL database and user from the MySQL Databases section.
- Open the WordPress installation in your browser to complete the setup. Enter the database details when prompted.
Manual installation might take longer, but it offers more customization options.
Configuring WordPress Settings
After setting up your Bluehost account and installing WordPress, the next step is configuring your WordPress settings. This ensures your website runs smoothly and is optimized for both user experience and SEO. Below, we will cover two key areas: setting up your site title and tagline, and choosing and installing a theme.
Setting Up Your Site Title And Tagline
One of the first things you should do is set up your site title and tagline. These elements provide essential information about your site and are important for SEO.
- Log in to your WordPress dashboard.
- Navigate to Settings > General.
- In the Site Title field, enter the name of your website.
- In the Tagline field, add a brief description or slogan.
- Scroll down and click Save Changes.
Your site title and tagline appear in browser tabs and search engine results, so make sure they accurately represent your site.
Choosing And Installing A Theme
The next step is choosing a theme. A theme determines the look and feel of your website. WordPress offers a wide range of free and premium themes to choose from.
- In your WordPress dashboard, go to Appearance > Themes.
- Click on Add New to browse available themes.
- Use the search bar to find a theme that suits your needs.
- Click Install on your chosen theme, then click Activate.
After activating your theme, you can customize it to fit your brand by navigating to Appearance > Customize. This section allows you to change colors, fonts, and layouts.

Credit: www.youtube.com
Enhancing Website Functionality
Setting up Bluehost is just the beginning. To fully optimize your website, enhancing its functionality is key. This includes installing essential plugins and setting up robust security features. Let’s dive into these crucial steps to ensure your website runs smoothly and securely.
Installing Essential Plugins
Plugins add features and improve your website’s performance. Here are some essential plugins to consider:
- Yoast SEO: Helps with on-page SEO optimization.
- Akismet: Protects your blog from spam.
- W3 Total Cache: Improves website speed and performance.
- Jetpack: Offers security, performance, and site management features.
- WooCommerce: Essential for setting up an online store.
To install a plugin, follow these steps:
- Log in to your WordPress dashboard.
- Navigate to Plugins > Add New.
- Search for the plugin name.
- Click Install Now and then Activate.
Setting Up Website Security
Website security is critical. Bluehost offers several tools to help protect your site. Here’s how to set up essential security features:
| Security Feature | Description | Steps to Set Up |
|---|---|---|
| Free SSL Certificate | Encrypts data between the server and users. |
|
| SiteLock Security | Scans for malware and protects against attacks. |
|
| CodeGuard | Provides daily backups and one-click restore options. |
|
Optimizing Your Bluehost Account
Setting up your Bluehost account is just the first step. To get the most out of your hosting service, it’s important to optimize your account. This involves configuring various settings to enhance your website’s performance, security, and functionality.
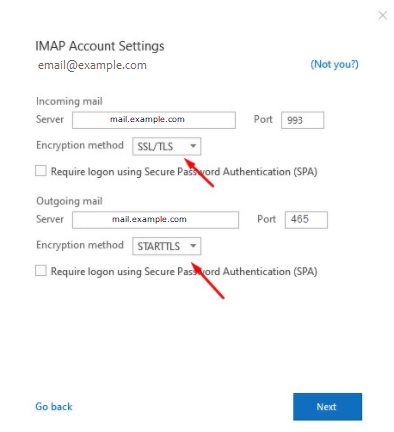
Setting Up Email Accounts
Creating professional email accounts is crucial for maintaining a polished business image. Bluehost makes this process simple:
- Log in to your Bluehost account.
- Navigate to the Email & Office section from the control panel.
- Click on Manage next to the domain you wish to add an email account to.
- Select Create to set up a new email account.
- Fill in the necessary details such as username and password.
- Click Create again to finalize your email account setup.
Repeat these steps for additional email accounts as needed. Remember to use strong passwords to enhance security.
Configuring Backup Options
Regular backups are essential to protect your data. Bluehost offers several backup solutions to fit your needs:
- Access your control panel and go to the Advanced section.
- Click on Site Backup & Restore under the Files category.
- Select the backup option that suits you:
- Basic Backup: Manual backups that you initiate.
- Pro Backup: Automated daily backups with easy restore options.
- Follow the on-screen instructions to complete the configuration.
It is recommended to schedule regular backups to ensure your data is always protected.
| Backup Option | Description |
|---|---|
| Basic Backup | Manual backups initiated by the user. |
| Pro Backup | Automated daily backups with easy restore options. |
Choose the backup solution that best fits your needs to maintain your website’s integrity and security.
Troubleshooting Common Issues
While setting up Bluehost, you might encounter some common issues. Knowing how to troubleshoot these can save time and reduce frustration. This guide covers resolving domain propagation delays and fixing common WordPress errors to help you get your site running smoothly.
Resolving Domain Propagation Delays
Domain propagation can take up to 48 hours. During this period, your domain might not be accessible. Here are steps to minimize delays:
- Check DNS Settings: Ensure DNS settings are correctly configured.
- Clear Cache: Clear your browser and DNS cache.
- Use Online Tools: Websites like What’s My DNS can track propagation.
- Contact Support: If delays persist, reach out to Bluehost’s 24/7 customer support for assistance.
Patience is key. Allow the full 48 hours for propagation to complete.
Fixing Common WordPress Errors
When using Bluehost for WordPress hosting, you may face some common errors. Below are solutions to frequent issues:
| Error | Solution |
|---|---|
| Internal Server Error | Check .htaccess file and increase PHP memory limit. |
| Error Establishing Database Connection | Verify database credentials in wp-config.php file. |
| White Screen of Death | Disable plugins and switch to a default theme. |
| 404 Page Not Found | Re-save permalinks in the WordPress admin area. |
Always keep a backup of your site before making changes. If issues persist, Bluehost’s support team is available to help.
These tips can help you troubleshoot and resolve common issues when setting up Bluehost. By following these steps, you can ensure a smoother and more efficient setup process for your website.
Conclusion And Next Steps
Setting up your website with Bluehost is a straightforward process. You now have a solid foundation for your online presence. Whether you run a blog, an e-commerce site, or a digital agency, Bluehost offers everything you need. From domain registration to web hosting, Bluehost covers it all. Now, let’s review your setup and plan for future growth.
Reviewing Your Setup
After completing the initial setup, it’s essential to review your website. Ensure all components are functioning correctly. Check the following:
- Domain Name: Confirm your domain is registered and pointing to your Bluehost hosting.
- SSL Certificate: Ensure the free SSL certificate is active to secure your site.
- Website Performance: Test your site’s loading speed to guarantee fast performance.
- Backup Settings: Verify daily backups are enabled for data security.
Use the user-friendly control panel to make necessary adjustments. This will ensure your website runs smoothly and securely.
Planning For Future Growth
As your website grows, your hosting needs may change. Bluehost offers scalability to accommodate your growth. Consider the following options:
| Hosting Type | Benefits | Starting Price |
|---|---|---|
| Shared Hosting | Ideal for small to medium websites | $2.95/month |
| VPS Hosting | More power and flexibility | $18.99/month |
| Dedicated Hosting | Maximum control and performance | $79.99/month |
| WordPress Hosting | Optimized for WordPress | $2.95/month |
Evaluate your website’s performance and traffic regularly. Upgrade to a higher plan if needed. This ensures optimal performance and user experience.
Take advantage of Bluehost’s 24/7 customer support. They can assist you with any questions or issues. With Bluehost, you have a reliable partner for your website journey. Explore their features and plan your future growth effectively.
Credit: www.bluehost.com
Frequently Asked Questions
How Do I Get Started With Bluehost?
To get started with Bluehost, visit their website, choose a hosting plan, and create an account. Follow the on-screen instructions to complete the setup.
What Are The Benefits Of Using Bluehost?
Bluehost offers reliable hosting, 24/7 support, a free domain for the first year, and easy WordPress integration. It’s beginner-friendly and affordable.
Is Bluehost Good For Beginners?
Yes, Bluehost is great for beginners. It has an intuitive interface, simple setup process, and excellent customer support, making it easy to use.
How Do I Install WordPress On Bluehost?
To install WordPress on Bluehost, log in to your account, go to the “My Sites” section, and click “Create Site. ” Follow the prompts.
Conclusion
Setting up Bluehost is easy and straightforward. Follow the steps, and you’re ready. Bluehost offers reliable performance and excellent customer support. Their plans fit different needs and budgets. Whether you need shared, VPS, or dedicated hosting, Bluehost has you covered. Plus, you get a free domain for the first year and a free SSL certificate. Start your website journey today with Bluehost. Check out more details here. Happy hosting!